Monday, February 22, 2016

What Style Means to Me

Maybe I shouldn't really say this, since I blog about clothes and style, but the truth is I never bothered much about clothes and fashion. I used to just take anything from my wardrobe without giving much thought to it, if it looked good or if things matched. I never spent much time shopping and I certainly did not spend my allowance on clothes or accessories. In fact, spending money on clothes always felt very difficult to me. I guess I though it was superficial. Maybe that's the reason why, even when I started to worry a bit more about how I looked, I hang on to some pieces I didn't really like because I didn't want to spend money on new clothes.

Worst, when I did start becoming somewhat interested in clothes I just ended up really frustrated. I remember having teenage tantrums because I hated everything in my wardrobe and had nothing to wear.

It's funny how some things change us quite suddenly. Even though I had already noticed the correlation between what I wore and how I felt, it was only ofter a particularly hard breakup that I decided to really focus on myself. That's when I decided my exterior image deserved to mirror how I felt inside - stronger, more confidant and young. The truth is, if I dressed well and took care of myself, I felt even better. Like I could take on the world.

That doesn't mean I started shopping as crazy and my wardrobe doubled in size. Not at all. I don't relate style to consumerism in any way. Actually I just threw out everything I didn't like and now I'm left with hardly anything. What I did do, was to take interest in my body. I want to understand what I like and what suits me and, with that information, shop more confidently and consciously. And that way, step by step, create a wardrobe that feels "me" and where I love every single piece (no exception!).

For me, having style doesn't mean you have to own much. You just need to have enough of things that make you feel good and in piece with your wardrobe. It's having exactly what you need to make you feel like you can conquer the world!


Se calhar é estranho eu dizer isto, visto que tenho um blog sobre moda e estilo, mas a verdade é que nunca liguei muito a roupa. Até muito tarde tirava qualquer coisa do armário e não dava muita importância a se combinava ou ficava bem. Não passava os meus tempos livres a ver lojas nem gastava a minha mesada em roupa. Aliás, sempre foi o dinheiro que mais me custou gastar. Achava que era uma coisa fútil ou superficial. Deve ter sido por isso que, mesmo quando me comecei a preocupar mais com a minha imagem, fui aguentando peças de que não gostava porque não queria gastar dinheiro.

Pior, quando me comecei a interessar por roupa e aquilo que vestia, acabava frustradíssima. Lembro-me de ter birras de adolescente porque odiava tudo o que tinha no armário e dizia que não tinha nada para vestir.

É engraçado como há algumas coisas que nos marcam e nos mudam para sempre. Apesar de já ter vindo a comprovar o efeito que a roupa tinha em mim, foi só depois de uma separação particularmente difícil, que decidi focar-me em mim própria. E foi aí que decidi que merecia que a minha imagem exterior fosse coerente com a forma como me sentia por dentro - mais forte, auto-confiante e jovem. A verdade é que, se me vestisse bem e tratasse de mim, ainda me sentia melhor. Sentia que conseguia enfrentar o mundo!

Isso não quer dizer que, de repente, comecei a ir às compras todas as semanas e que o armário duplicou de tamanho. Eu não relaciono estilo directamente com consumismo. Na verdade, o que aconteceu é que deitei fora tudo aquilo que não gostava e agora tenho praticamente nada para vestir. Assim começo do zero. Agora Interesso-me em conhecer o meu corpo, perceber o que gosto e o que me favorece e, com essa informação, conseguir fazer compras mais informadas e assim criar um guarda-roupa com o qual me identifico e onde gosto de todas as peças que lá estão, sem excepção.

Para mim estilo não é ter muito. É ter o suficiente para nos fazer sentir bem e em paz com o nosso guarda-roupa. É ter exactamente aquilo que precisamos para nos dar a convicção de que conseguimos enfrentar o mundo.

Thursday, December 24, 2015

A blue coat for chilly days

These past weeks have been hectic, between long working days, the flu and everyday life. But I made it here again!

Today I feel like I'm kind of cheating since this coat I'm showing you was made last year, but I think it's so cute it's worth it. The pattern is from Maria Modista and I'm pretty sure it was the first thing I actually made for myself.

Hope you like it and I'm happy I made it in time to wish you all a Merry merry Christmas!


Entre longos dias de trabalho, gripe e os afazeres do dia-a-dia, tenho andado a mil estas últimas. Mas finalmente arranjei um tempinho para cá voltar!

Hoje sinto que estou a fazer batota, porque este casaco já foi feito o ano passado. Ainda assim, acho que está tão giro que vale a pena mostrar. O molde é da Maria Modista e tenho quase a certeza que foi a primeira coisa que fiz para mim mesma.

Espero que gostem e estou feliz por ter chegado a tempo de vos desejar a todos um óptimo Natal!


Tuesday, November 10, 2015

Basic Zipper Pouch Tutorial


Hi! Today I'm going to share with you a super easy tutorial that I'm sure will come in handy: a basic zipper pouch.

I've always thought handmade presents were much more special and, specially since I've started sewing, I always try to make something instead of buying. If you think so too, this can be a very easy but nice looking gift that you can finish in no time.

To make your zipper pouch you'll need:

4 rectangles of fabric measuring 16 x 10 cm (2 for the outside and 2 for the inside). I used faux leather for the outside and a woven cotton fabric for the inside.
2 rectangles of interfacing measuring 16 x 10 cm (I didn't use it because the leather was already quite stiff)
16 cm zipper
Thread (matching or contrasting)

Hoje vou partilhar convosco um tutorial muito fácil que, de certeza, poderá vir a dar muito jeito: uma bolsa com fecho básica.

Sempre achei que presentes feitos à mão eram muito mais especiais e, especialmente desde que comecei a costurar, tento sempre fazer alguma coisa para oferecer, em vez de comprar qualquer coisa já feita. Se também partilha desta opinião, esta bolsa pode ser um presente fácil de fazer mas muito giro.

Para fazer a bolsa vai precisar:

4 rectângulos de tecido a medir 16 x 10 cm (2 para o exterior e 2 para o interior). Usei uma imitação de pele para o exterior e um algodão para o forro
2 rectângulos de entretela a medir 16 x 10 cm (como a pele já era bastante grossa não usei)
Fecho com 16 cm
Linha (a condizer ou a contrastar com o tecido exterior)


1. If using, fuse the interfacing to the wrong side of the outside pieces (the side with the glue facing the fabric).
1. Se estiver a usar entretela, cole-a ao avesso dos rectângulos exteriores (o lado com cola virado para o tecido).

2. Place one of the lining pieces on top of one of the outside pieces, right sides together, with the zipper in between them - its face down on the outside piece. Pin and stitch with a 1 cm seam allowance, using a zipper foot.
2. Coloque um dos rectângulos do forro em cima de um rectângulo exterior, direito com direito, com o fecho entre eles - os dentes do fecho contra o direito do tecido exterior. Alfinete e cosa com um valor de costura de 1 cm, usando um calcador para fechos.


 3. Flip both pieces to the right side and press flat with an iron. Topstitch close to the edge (around 3 mm from the edge). Follow the same steps for the remaining pieces of fabric.

3. Vire ambos os tecidos do direito, passe com o ferro e pesponte junto à borda (a cerca de 3 mm). Faça o mesmo com as restantes peças.


4. Open the zipper halfway and and pin the outside pieces together, right sides facing. Do the same for the lining pieces and be sure to pin the end of the zipper to them. Sew all around the rectangle with a 1 cm seam allowance, leaving a 5 cm gap at the bottom of the lining. When going over the zipper be very careful and sew by turning the handle on your machine, otherwise the needle might break.

4. Abra o fecho até meio e alfinete os dois rectângulos exteriores um ao outro, direito com direito. Faça o mesmo com os rectângulos do forro, tendo o cuidado de segurar também a ponta do fecho. Cosa a toda a volta com 1 cm de valor de costura, deixando um espaço de 5 cm no fundo do forro. Quando estiver a coser por cima do fecho, tenha muito cuidado e cosa virando a manivela da máquina, caso contrário, a agulha poderá partir-se.
 

5. Clip the corners and turn the pouch right side out, through the gap we left in the lining, then through the zipper opening. Push corners out and press. Close the gap at the bottom of the lining with an invisible stitch and you’re good to go!

5. Corte as pontas e vire a bolsa do direito através da abertura no forro e, depois, pelo fecho. Empurre as pontas para fora e passe com o ferro. Feche o espaço no fundo do forro com um ponto invisível ou pesponte à máquina. E já está!


Thursday, November 5, 2015

(Late) KCW Update and my new favourite pattern

Wow! It took me a long time to write this update! But now that I have, let me take you through my creative process.

I really liked this fall's theme - Disguise. When I read it for the first time I imediately thought of the colors 'disguise' reminded me of - beautiful muted tones that wouldn't stand out in a crowd.

I had planned to sew a Jon-Jon, using a Simplicity vintage pattern (8989) - and a Myrantine blouse from Citronille. But, I had a big 'oops!' moment and when I was trimming the blouse's neckline seam allowance, the fabric got stuck in the scissors somehow and I ended up cutting through the blouse. So, insted, I ended up making the Halloween costumes I talked about here . I already bought more pink plumeti to finish the blouse though and I want to get back to that shortly.

I'm glad I had this challenge to "make me" sew, because if not I would have succumbed to my tiredness and wouldn't have sewed all week (I'm more of a day person and by 10 pm I just want to go to bed). Good thing is that once I started sewing I would forget about sleeping for at least two hours.

Can't wait for the winter edition! Thank you Meg and Dorie for this amazing challenge!

So this is the Simplicity Jon-Jon - my new favourite! And it's really easy to sew. It ended being a bit too short so I added some lace at the bottom. But I think it looks even cuter and more feminine.

Demorei algum tempo a escrever este update! Mas agora que já consegui vou levar-vos pelo meu proceso criativo.

Gostei imenso do tema deste outono - Disguise, ou disfarce. Quando li pela primeira vez, pensei logo nas cores que a palavra me recordava - cores "apagadas" que não chamam a atenção.


Tinha planeado fazer um macacão (Jon-Jon) com um molde vintage da Simplicity (8989) e uma camisa com o molde Myrantine da Citronille. Mas tive um momento 'oops!' e quando estava a cortar o valor de costura da camisa, sem querer, a tesoura apanhou um bocado de tecido e acabei por cortar o corpo da blusa. Por isso, em vez de começar de novo, acabei por fazer os fatos de Halloween de que falei aqui. Mas já comprei mais plumeti cor-de-rosa para acabar a camisa e espero fazê-lo em breve.

Ainda bem que tinha este desafio para me "obrigar" a costurar porque, caso contrário, não tinha conseguido resistir ao sono e não tinha costurado nada a semana inteira (sou mais uma pessoa "diurna" e às 22h, já só me apetece dormir). Mas o pior é começar, e assim que começava a costurar passava-me o sono e conseguia aguentar, pelo menos, duas horas.

Mal posso esperar pela edição de inverno. Obrigada Meg e Dorie por esta ideia fantástica!


E este é o macacão (Jon-Jon) da Simplicity - o meu novo molde preferido! E é mesmo fácil de fazer. Acabou por ficar um bocado curto de mais e, por isso, usei um bocado de bordado inglês para disfarçar. Mas por acaso acho que até ficou mais querido e feminino.


Bow by Lemon Hair Lovers.

Laço da Lemon Hair Lovers.

Saturday, October 31, 2015

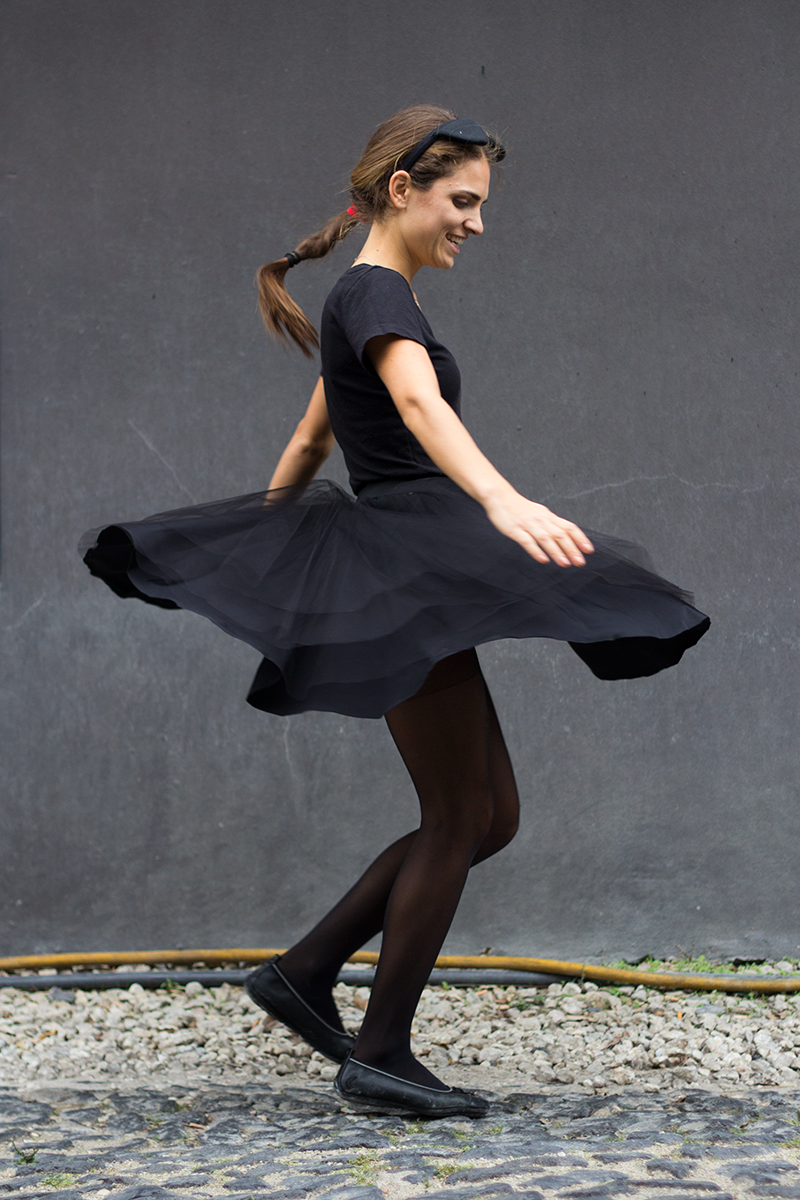
Our Matchy-matchy Halloween Costumes

Last week the school where I'm working had its Halloween party and I thought Inês would like to come along with me and have some fun.

Since it was KCW (and the theme was actually 'disguise') but I didn't have much time I decided to make us a very simple Halloween costume: an easy circle skirt made of black tule and a knit lining and cat ears for both of us.

This is how it turned out!


Na semana passada foi a festa de Halloween da escola onde estou a trabalhar e levei a Inês comigo para que ela se pudesse divertir também.

Já que estava a decorrer o KCW (e o tema era 'disfarce') mas não tinha muito tempo, decidi fazer uns disfarces de Halloween muito simples: umas saias circulares de tule preto, forradas com uma malha preta, e umas orelhas de gato para as duas.

Isto é como ficámos!


j
Happy Halloween to all of you!

Um óptimo Halloween a todos!

Monday, October 19, 2015

KCW is here!

Today is the first day of Kid's Clothes Week Fall Challenge. It's my first KCW ever and I'm really excited.

For those of you who never heard about it, KCW is a seasonal sewing challenge, in which each person commits to sewing clothes for their kids for one hour each day, for seven days. For me, it's an excuse to stop pinning wonderful clothes on Pinterest and actually start making them.

Because juggling work, a daughter and the house and still finding time to sew is already quite hard I did some preparing in advance to be able to finish what I set myself out to do.


I've got my sewing list figured out and the pattern pieces are already cut out. The fabrics I'll be using were already washed and ironed and are ready to use. And I've made sure I have all the tools and notions I will need.


I'm actually quite proud of myself (because I'm not a very organised person by nature). I hope everything goes according to plans. If not, at least it won't be because I wasn't prepared!


Hoje é o primeiro dia da edição de outono do Kid's Clothes Week. É a primeira vez que vou participar e estou muito entusiasmada.

Para quem nunca ouviu falar, o KCW é um desafio que acontece uma vez no início de cada estação do ano, em que cada participante compromete-se a costurar roupas para crianças (filhos ou não), pelo menos uma hora por dia, durante uma semana. Para mim, é uma desculpa para parar de guardar imagens maravilhosas no Pinterest e pôr as mãos à obra.

Conciliar trabalho, uma filha, a casa e ainda arranjar tempo para costurar não é muito fácil, já fiz alguns preparativos para ver se consigo acabar aquilo a que me propus.

Já tenho a lista de costura definida e as peças dos moldes já estão cortadas. Os tecidos que escolhi já foram lavados e passados a ferro e estão prontos a usar. E até já me certifiquei que tenho todas as ferramentas e acessórios de que preciso.

Tenho a dizer que até estou orgulhosa de mim, visto que não sou uma pessoa muito organizada por natureza. Espero que tudo corra como planeado. Se não acontecer, pelo menos não será por falta de preparação!

Wednesday, August 26, 2015

Defining a core style

Clothing and style have a lot to do with shapes, proportions and silhouettes. We normally like silhouettes that emphasize the parts of our body we want to "show off" and cover those we're not so comfortable with. When defining you're core style think about what silhouettes your naturally drawn to and tend to choose over and over and use these as templates for creating your outfits.


Moda e estilo têm muito a ver com formas, proporções e silhuetas. Por norma, gostamos de silhuetas que dão ênfase a partes do corpo que queremos "mostrar" e escondem as que não gostamos tanto. Ao definirmos o nosso estilo "core", devemos pensar quais são essas silhuetas para as quais somos naturalmente puxadas e que escolhemos vezes sem conta e usá-las como "templates" para criar os nossos conjuntos.


Here are some silhouettes I came out with:
Estas são algumas das silhuetas que gosto para mim:

Loose top + full skirt + flat shoes // Loose and chunky top + full skirt
Top largo + saia cheia + sapatos rasos // Top largo e "chunky" + saia cheia


Loose, short dress + booties (may add cardigan) // Fitted bodice, full bottom dress + booties
Vestido largo e curto + botins (pode adicionar um casaco de malha) // Vestido com top justo e saia rodada + botins


Semi fitted top + fitted pants + slightly loose hip high jacket + flat shoes // Semi fitted top + Loose and chunky cardigan + fitted pants + flat shoes
Top meio justo + calças justas + casaco ligeiramente largo pela cintura + sapatos rasos // Top meio justo + casaco de malha largo e "chunky" + calças justas + sapatos rasos


Fitted jeans + loose top + loose parka + booties // Short shorts + loose top + loose blazer + booties
Calças de ganga justas + top largo + parka larga + botins // Calções curtos + top largo + blazer largo + botins

From here, I can play around and create variations for each silhouette and see how many outifts I could get out of just a few pieces.
Well, see you soon!

A partir daqui posso experimentar diferentes variações de cada silhueta e ver quantos conjuntos consigo fazer com apenas algumas peças.
 Até logo!